

Moments before the protagonists from the movie Hackers work together to overload the Gibson–after rollerblading through New York City via an undisturbed route of compromised traffic signals–each one of them rolls into a phone booth in Grand Central Station and boots up their laptop. During this scene, the camera pans across the laptop screens of each respective hacker as their computer plays a special, customized animation.
Ever since I saw this scene I wanted to do something like this to one of my machines. I’ve been getting really into Linux on the desktop recently, so I thought this would be a great opportunity since I now have the ability to change my login screen to whatever I want.
I had been using XSecureLock for quite some time now. I really liked it for its simplicity. After examining the source code a bit, I was also pleased to discover just how modular it is. XSecureLock was designed to do the “heavy lifting” for you with regards to handling the challenges/gotchas with actually making sure your screen is locked, and no other program in the background can steal focus.
The modular part of XSecureLock is that it’s separated into three separate executables, launched in order. The first is the actual xsecurelock executable, which blanks the screen, captures all input from the keyboard and mouse, and continuously prevents any other window from appearing on top of it and stealing focus. The second part is the locker GUI. XSecureLock refers to this as the “saver”, because it assumes you’re using a screen saver to show the password dialog (for instance, XScreenSaver provides this functionality via a shared dialog window for all hacks). Lastly, XSecureLock provides an authentication program, intended to be forked from your “saver”, which is responsible for asynchronously doing the work of authenticating with libpam.
Therefore, a custom screen locker would fit in right between the authenticator and XSecureLock itself. The cool thing about each part being separate executables is that you can write each piece in whatever language you choose, because there aren’t even any dependencies between them. All you need to do is return 0 from your main function on success, or non-zero on failure.
That being said, I expressed no creativity with regards to the programming language choice and just went with C. I hadn’t written a big C program in a long time, so I thought it might be fun to do it again. For graphics, I used the wonderful Cairo Graphics library. API wise, Cairo is really similar to Apple’s CoreGraphics library, which I was already really used to.
To make it so your screen locker works with XSecureLock, there are only two things your program needs to use. The first is an environment variable called XSCREENSAVER_WINDOW, which actually refers to the X11 root window your program uses to draw into. Simply open the display via XOpenDisplay, then call XMapWindow with the result of XOpenDisplay and hand it the unsigned long long value of XSCREENSAVER_WINDOW.
// Open display
__display = XOpenDisplay(NULL);

// Get window from XSecureLock
const char *env_window = getenv("XSCREENSAVER_WINDOW");
if (env_window != NULL && env_window[0] != 0) {
    char *endptr = NULL;
    unsigned long long number = strtoull(env_window, &endptr, 0);
    __window = (Window)number;
}

// Map window to display
XMapWindow(__display, __window);
The second thing your program needs to do to work with XSecureLock is handle keyboard input via a special file descriptor. Because XSecureLock overrides a lot of X11’s behavior with regards to keyboard events, you can’t just use the standard XNextEvent to handle key press events. Instead, when xsecurelock is forking itself to start your program, it sets up the stdin file descriptor to contain a one-character buffer of what the user has typed so far. Thus, to handle input in your program, you just need to continuously read bytes from stdin and write that to some other buffer somewhere, and eventually send that to libpam for actually authenticating.
After authenticating via libpam, if it was successful your program just needs to exit with status 0. If it was not successful, you should loop your authentication routine again and prompt the user for the password again.
It’s up to you to implement some kind of rate limiting, as that’s not really in the libpam specification.
Here’s the final result!
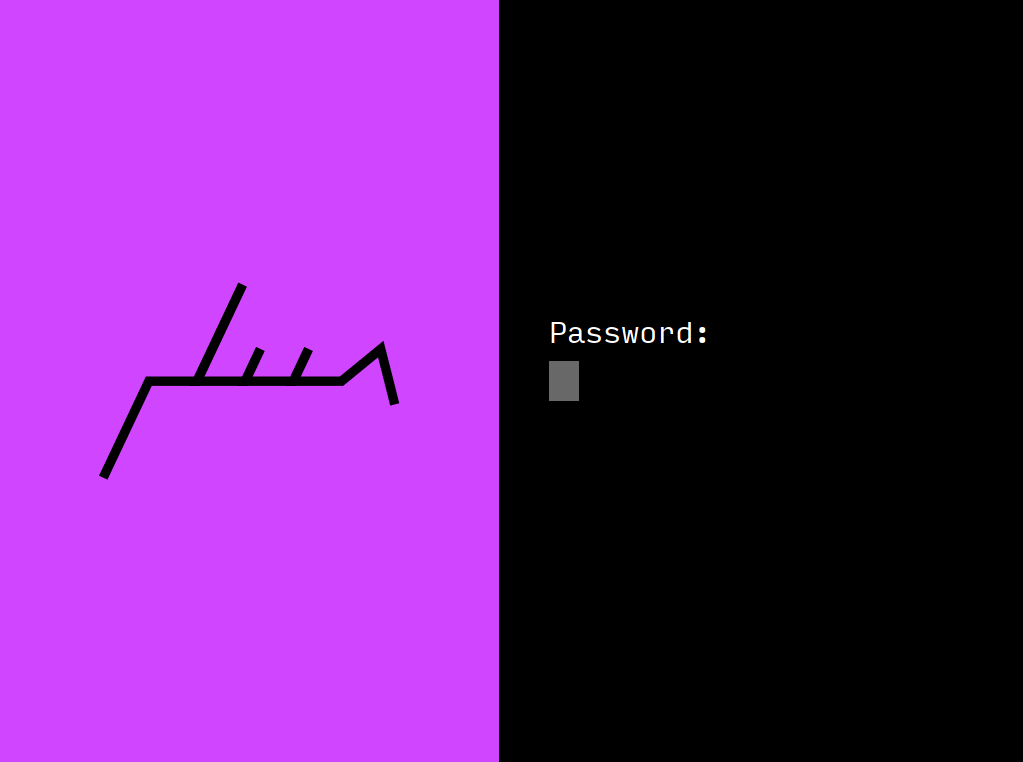
I went for an extremely minimal design (for now, at least). There are some cool animations implemented as well, such as a red flash when you enter the incorrect password, a spinning indicator for when my locker is asynchronously authenticating via libpam, and a flashy transition in and out. Obviously, I designed it to look a lot like this website for “consistent branding”.
You can check out the source code on my GitHub. Send me an email if you decide to make your own screen locker design as well!