
In my last post about DIY smart appliances, I wrote about thermostats. Chipotherm has been running for over a year now at the arcade, and it’s still working great! Armed with enthusiasm for my DIY smart thermostat, and having just moved into a new house that came with a Ring doorbell, I thought I might try building my own DIY doorbell to replace it.
My motivations for this project were beyond just wanting to build something new and fun. The Ring Doorbell, which is now owned by advertising megacorp Amazon, suffers from all of the same privacy problems described in my post about the Nest thermostat, but even worse. Like the Nest thermostat, the client software is a total “race to the bottom” one-size-fits-all garbage iOS app that not only looks bad, but is full of bugs. Also like the Nest, all of your data is hosted in “the cloud”, and a monthly ransom is required before you (“the customer”) are actually allowed to access it. Worse than the Nest, however, is the fact that the Ring doorbell actually has a camera and microphone built-in, so video and audio feeds are also held for ransom in “the cloud”, and are shared with any interested party, sometimes even without your permission.
Just like many other Internet of Things products, the Ring has also been subject to multiple disastrous data breaches, meaning besides law enforcement agencies and advertising partners, many Ring customers’ private data is now also in the hands of malicious hackers, who may in the future offer ransoms that are much harder to refuse than the one offered by Amazon. This article from Ars Technica seems to indicate that the problem is also about to get much worse, with automatic license plate detection in the works and more police partnerships.
In today’s world of corporate surveillance, building your own DIY smart appliances is a true superpower—and a lot of fun too! I originally planned to just have a simple button, perhaps attached to an ESP8266, which is a wonderful new WiFi microcontroller that’s becoming extremely popular these days with home automation enthusiasts. The project quickly grew in scope as I decided to also add a cool LED and a camera (whose feed is hosted entirely on-prem).
The Hardware
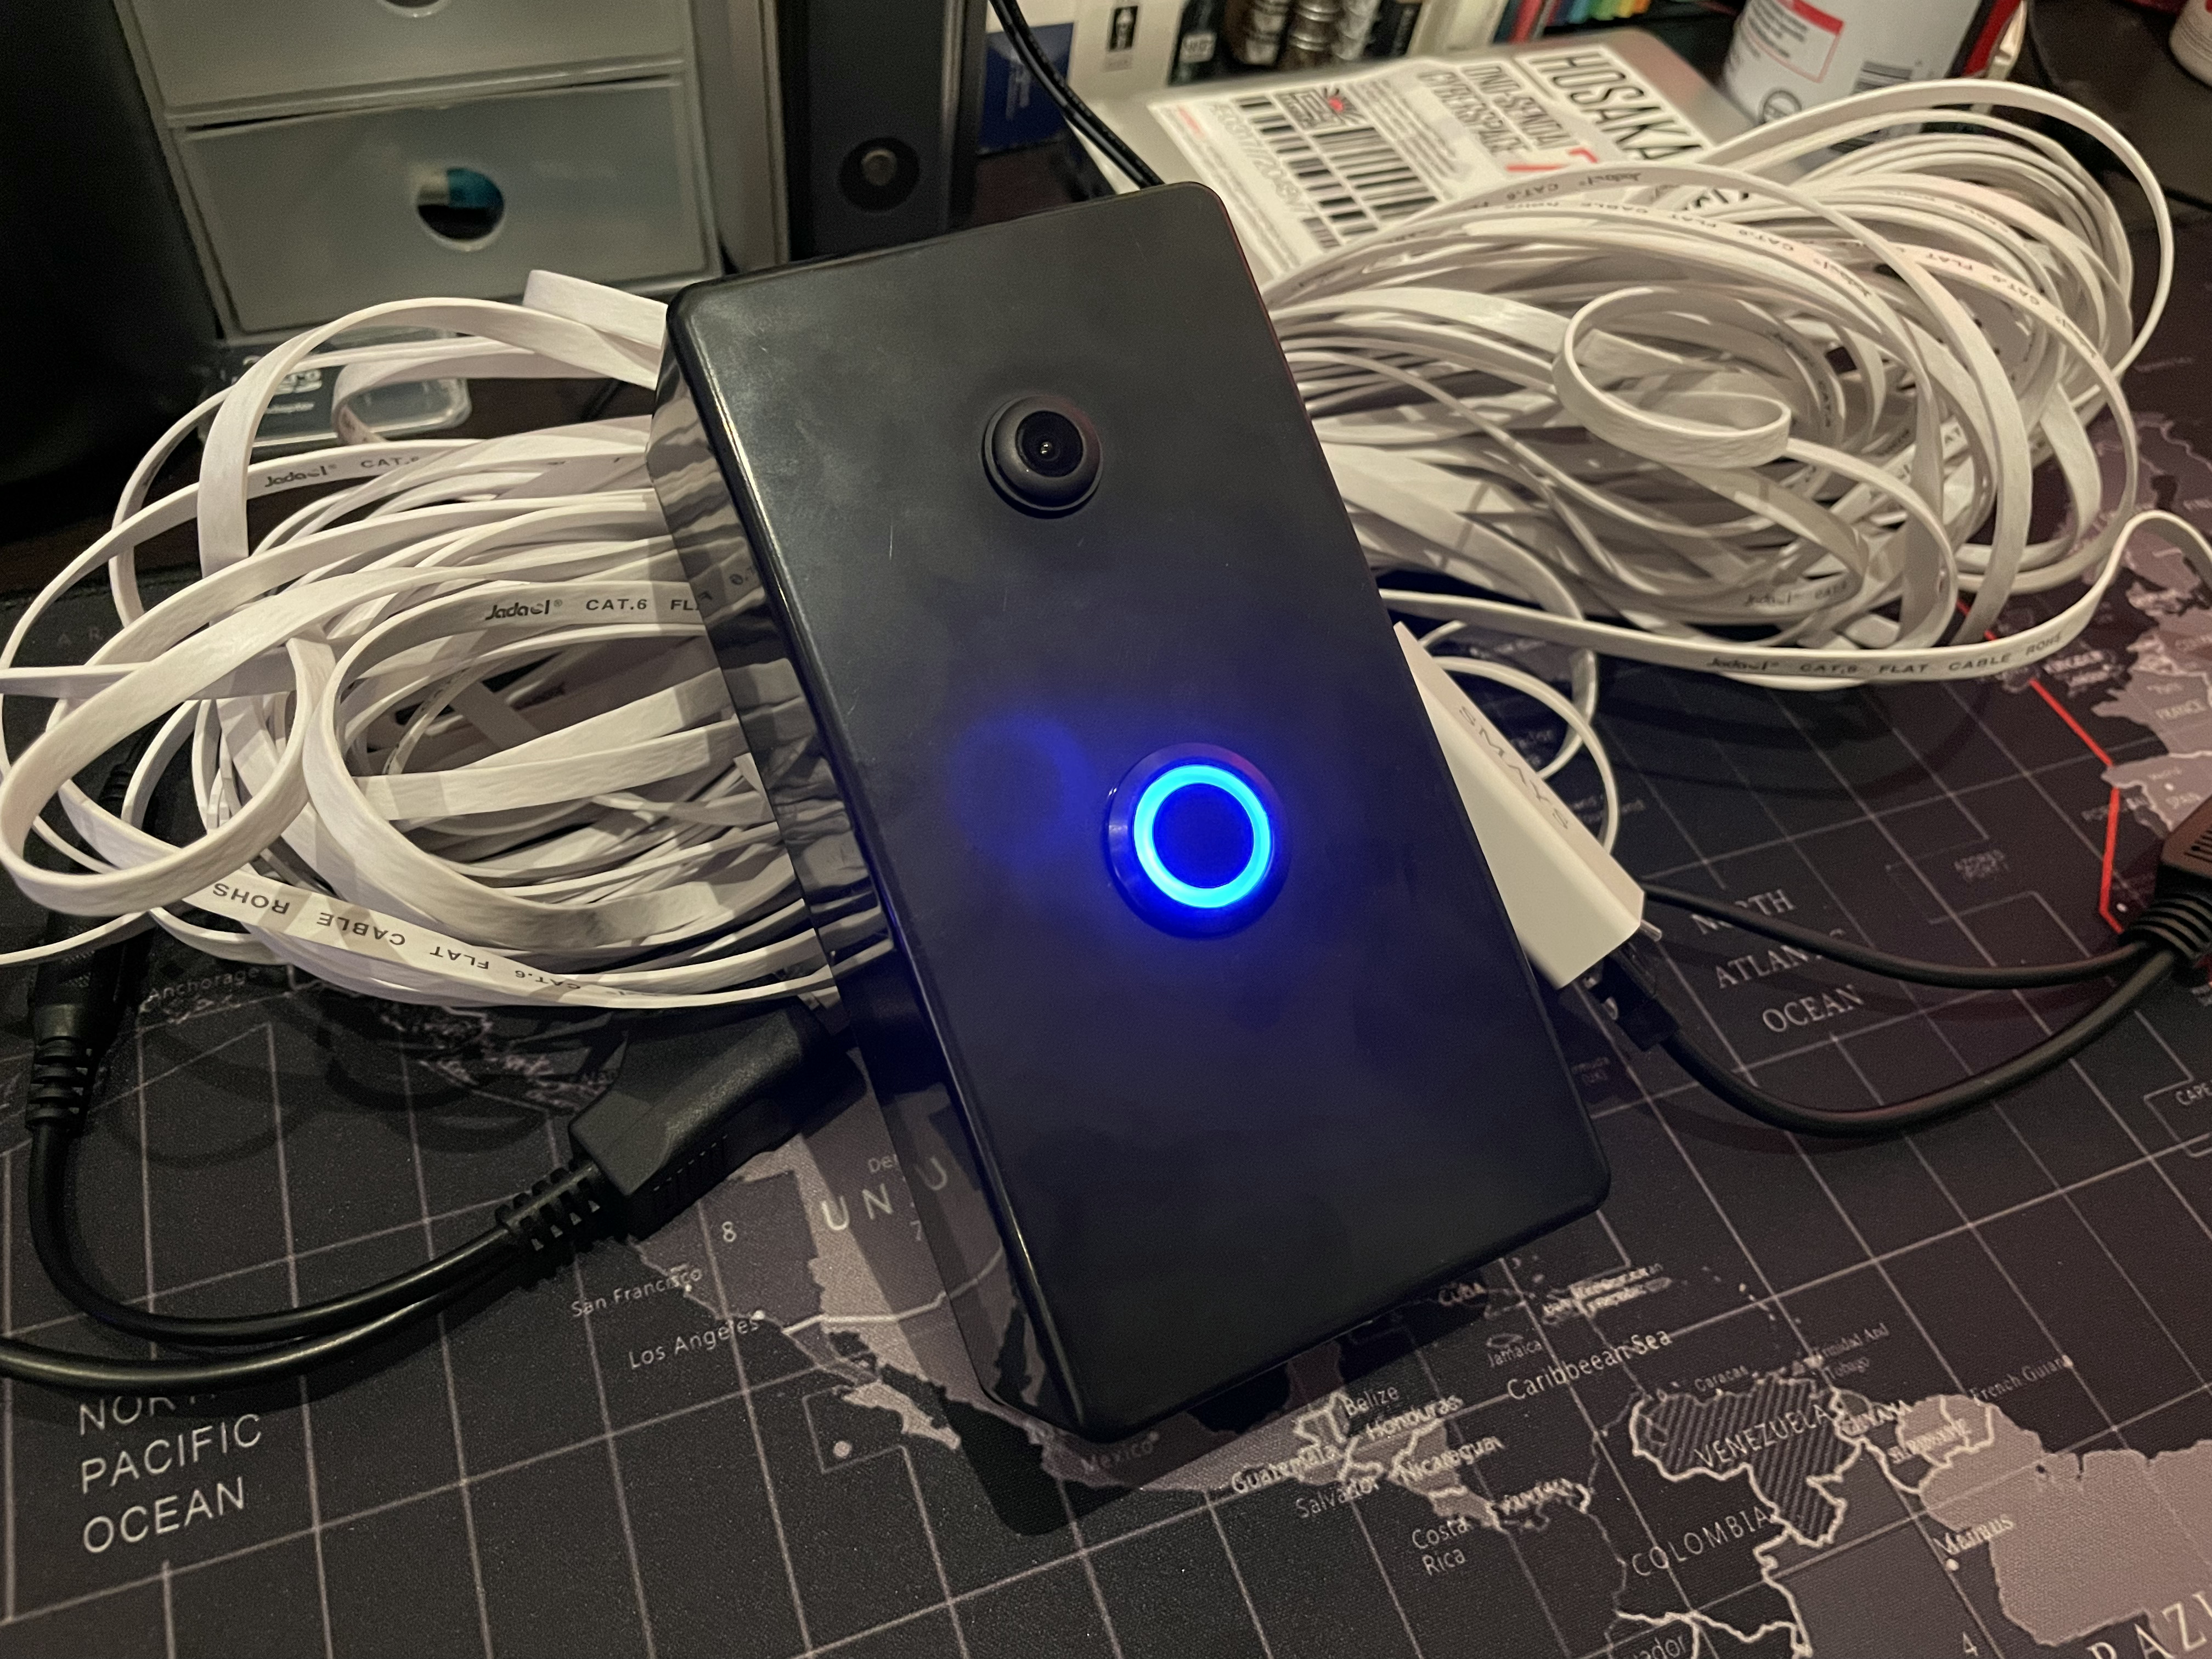
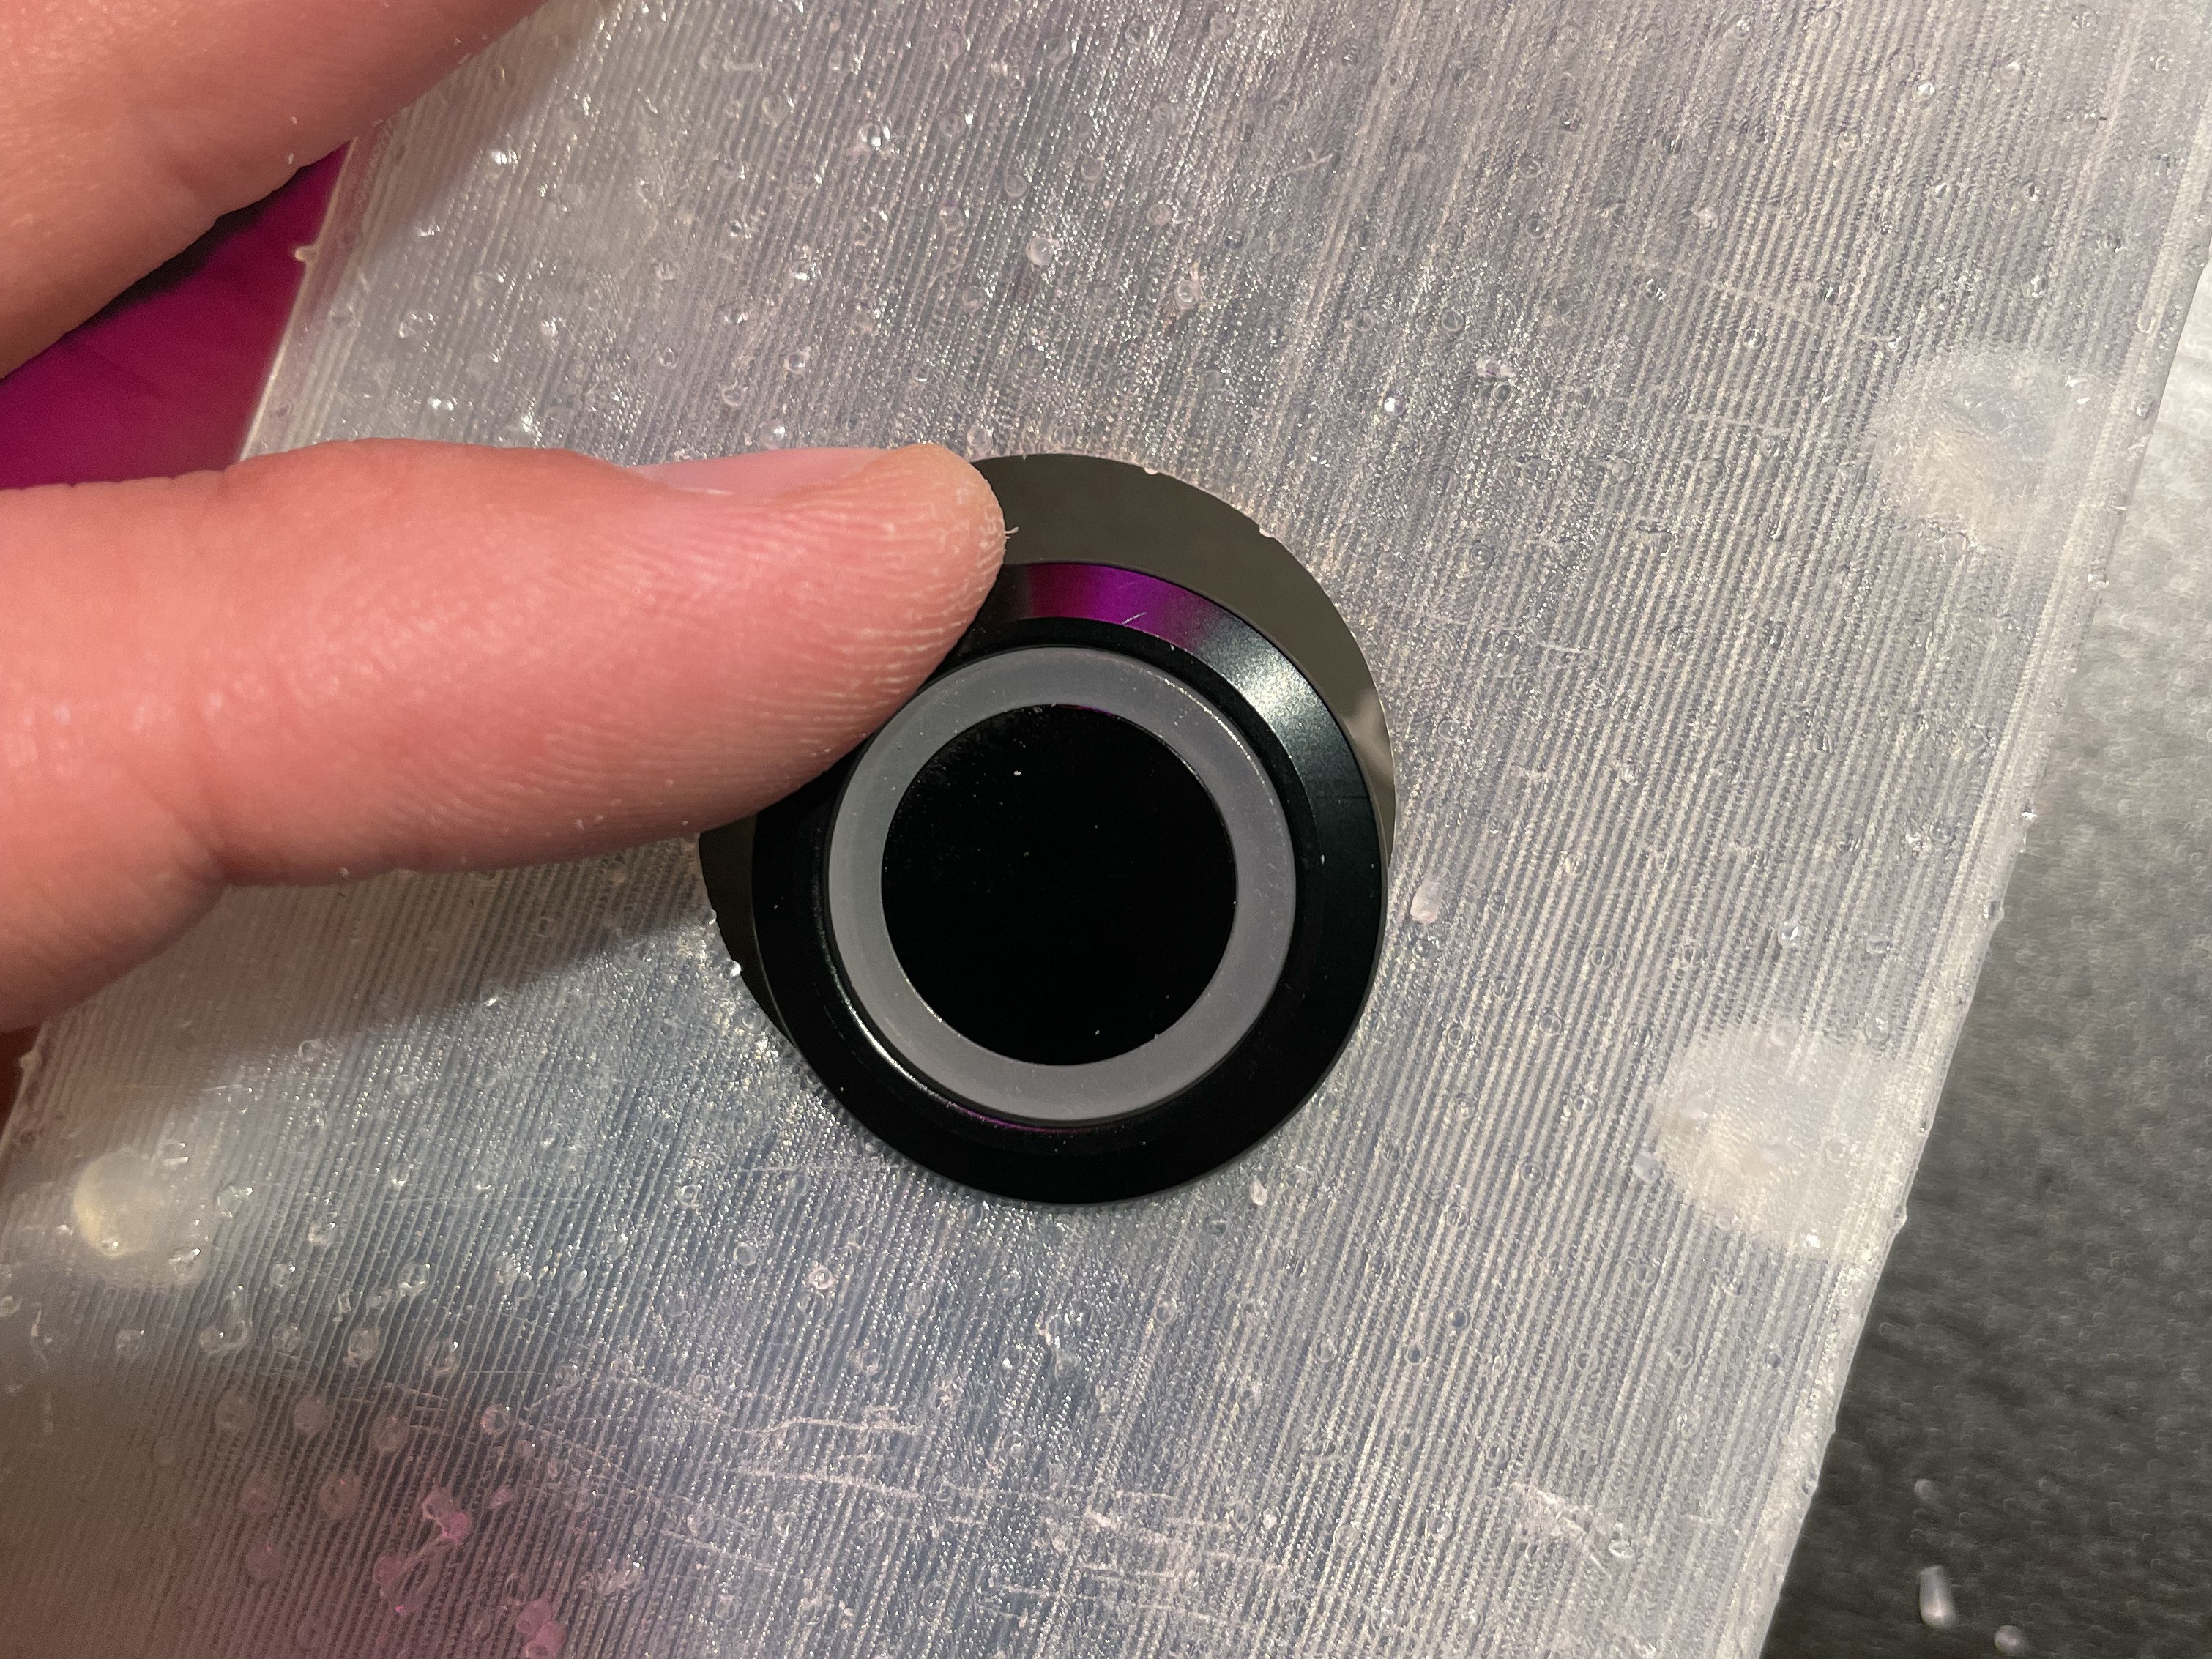
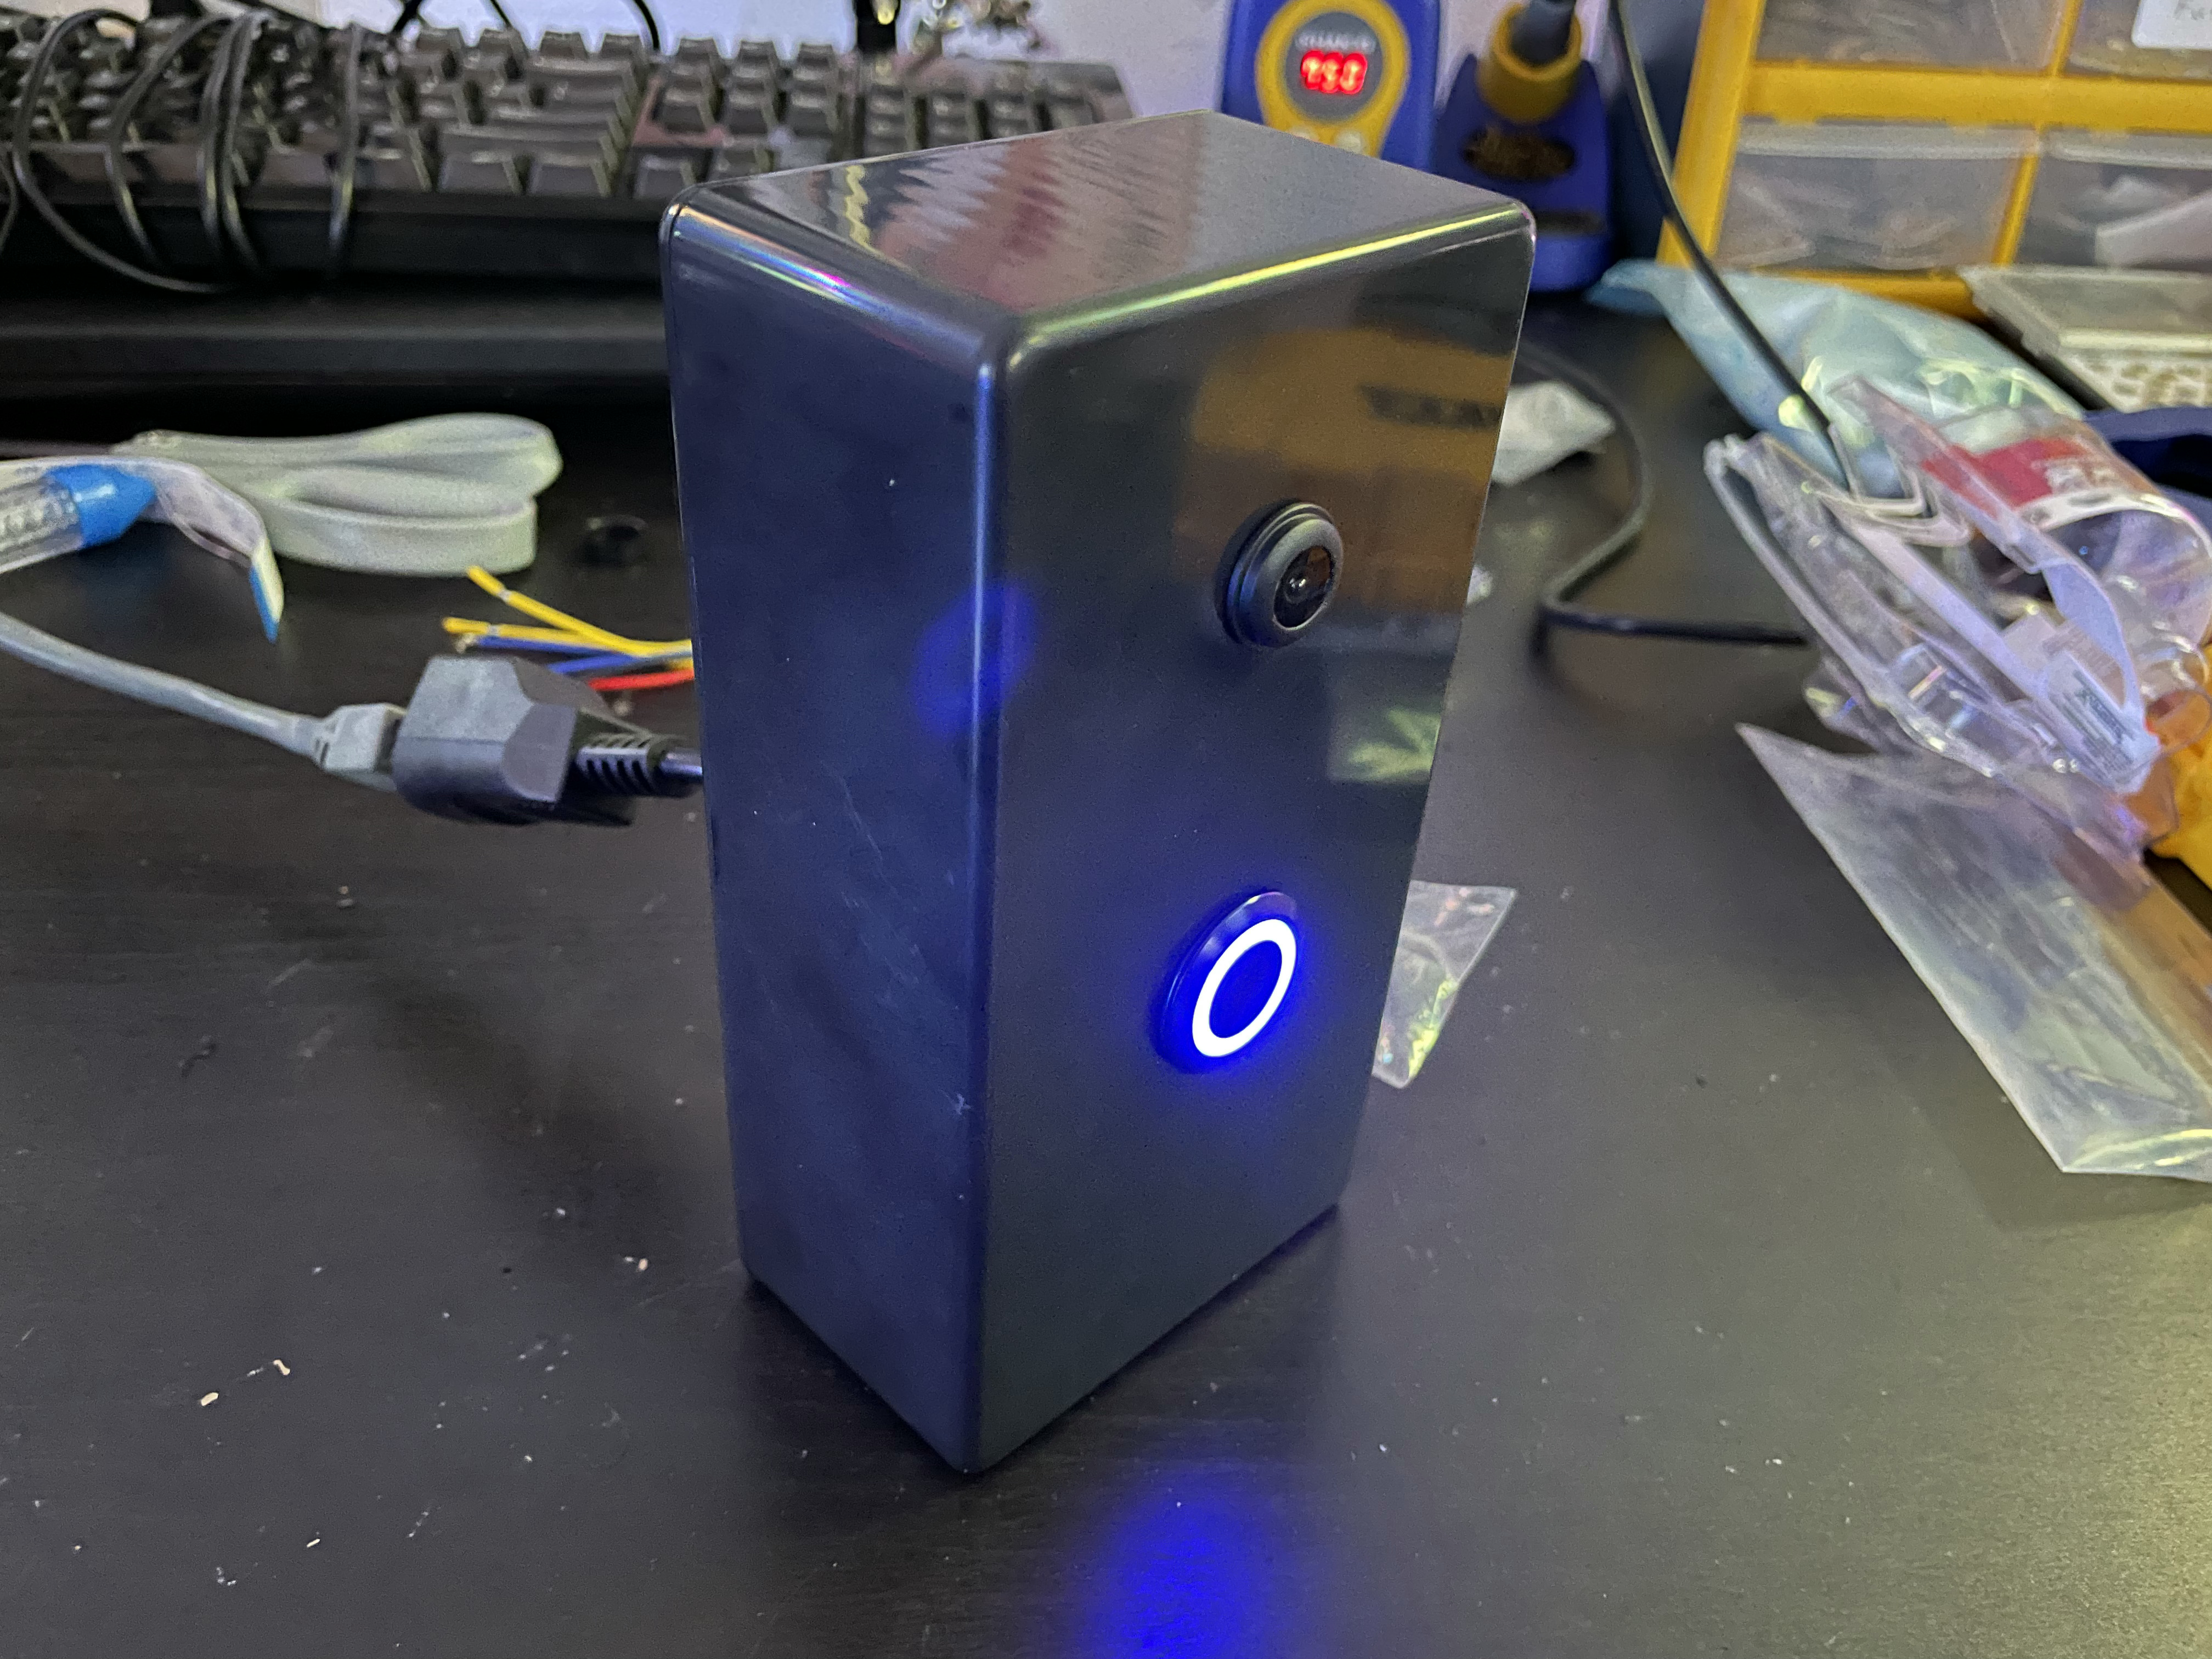
For the hardware, the first thing that comes to mind is obviously the button. I decided to buy a cool “engine starter” automotive button 1 first, and design the rest of the doorbell around that. The LED around button is powered via 12vDC as well, so if I wanted to be able to control it via software, I’ll also need to get a MOSFET and build a small circuit.

To control everything, I decided to use a Raspberry Pi Zero, since it has ample GPIO pins for detecting the switch press, a PWM pin for modulating the LED inside of the button, and a special camera bus. The Raspberry Pi Zero’s super small size also meant I can probably fit it inside of pretty much anything, and it was very unlikely to demand very much power or cooling resources.
As for wiring, fortunately the previous owner of my homestead had already wired the front gate (where this was to be installed) with Ethernet, presumably for some kind of call box or security system. This meant that using Power-Over-Ethernet (PoE), I could run both power and networking from the garage where my router/server was located to the gate where the doorbell was to be installed. This required a basic PoE splitter/receiver, and an Ethernet adapter for the Raspberry Pi Zero (since it doesn’t have onboard Ethernet like the full-size Raspberry Pi does).
Lastly, the case to put everything in. I thought this would be easy to 3D print, since it’s just an enclosure with a hole in the front and in the back, but it turned out to be rather difficult to build. The 3D printer in my possession, a first generation Makerbot Replicator, wasn’t able to print parts that fit together nicely. The end result was three separate plastic pieces that didn’t fit together well and ended up being really flimsy.
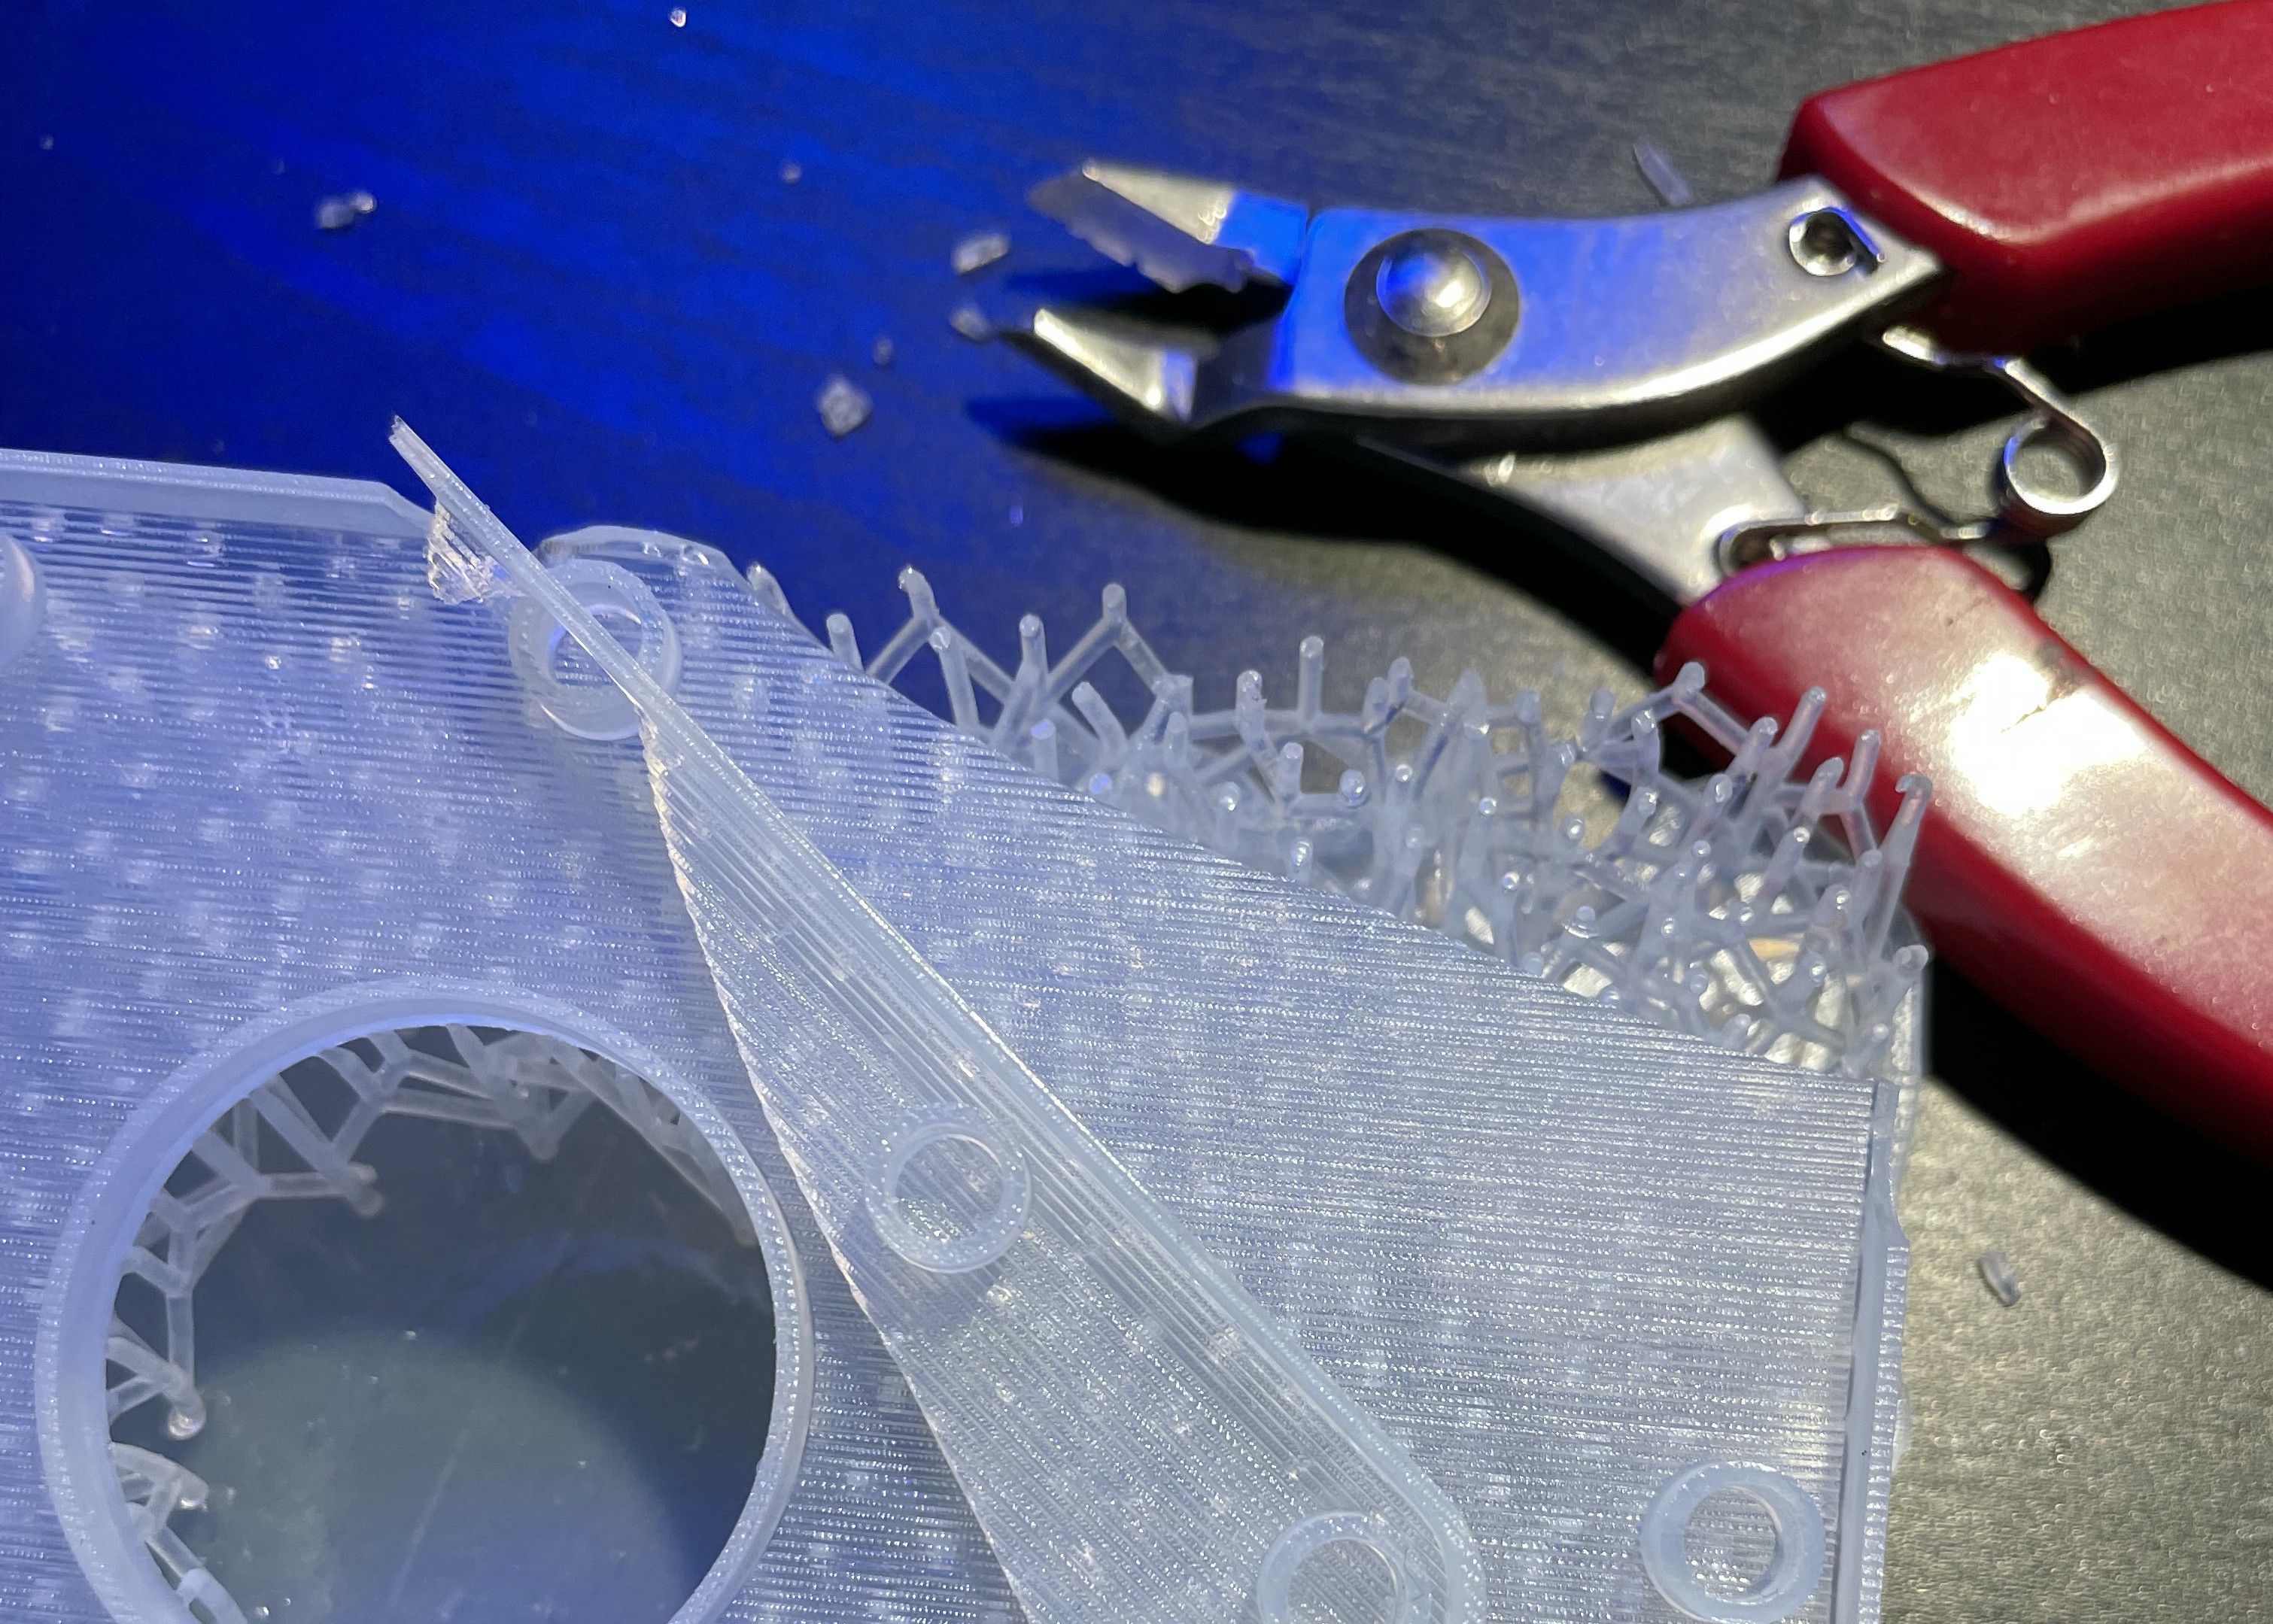
A friend of mine had a much more expensive Stereo-lithography 3D printer, so I had him try and print the same design I originally came up with. This resulted in a much more accurate print, with pieces that fit together really nicely. However, perhaps due to the type of resin that was used, also ended up being extremely flimsy.
I’m also apparently really bad at measuring.
I ended up buying a really great injection molded enclosure from Digikey for about $9. It ended up being really easy just drilling holes in a mass-produced enclosure instead of 3D printing a custom design. The quality is also far better than any of my prints.

All in all, here’s a list of parts that I used:
- Raspberry Pi Zero
- MGI SpeedWare Automotive Button
- Fisheye Camera for Raspi
- Plastic Enclosure
- Power Over Ethernet Injector/Splitter
- Voltage Regulator (to go from 24vDC to 5v to power the Pi)
- MOSFET transistor
- USB Ethernet Adaptor
Total cost is about $50.
The Software
In order to replicate the most important part of the functionality of the Ring, there will need to be some software running on the Raspberry Pi that polls for button presses, which then contacts some computer on my network to notify me about doorbell events. I call these “dings” 2. Just recently, I had learned about this great protocol admired by DIY IoT enthusiasts called MQTT, or The Message Queuing and Telemetry Transport protocol. The gist of it is that it’s a PubSub (publisher-subscriber) protocol for any kind of message. It’s kind of like NSNotificationCenter, but for your local network. There are topics and messages, and that’s about it. Topics are usually in the format of domain/subdomain/topic, but it can really be anything you want, as long as it’s consistent in your implementations.
In the case of my doorbell, the topic I chose is doorbell/ding for ding events. The button is physically connected to a GPIO pin on the Raspberry Pi, so there’s a bit of code that polls for this pin to go high, and when it does, a message is published to the doorbell/ding topic over MQTT.
Now that the doorbell itself is notifying my network about ding events, I just need something on the other end that subscribes to these events and notifies me somehow. Just recently, I had set up a small GNU/Linux PC and a receiver connected to the speakers in my living room as an MPD server for playing music. Getting this computer to play a doorbell sound whenever a message was posted to the ding MQTT topic was extremely easy! All I had to do was write a small shell script that runs in a loop.
#!/bin/sh
while true; do
	mosquitto_sub -h hassio.nor -t doorbell/ding -C 1
	aplay doorbell.wav
done
All this shell script does is use mosquitto_sub to subscribe to the doorbell/ding topic on hassio.nor (that’s my MQTT server, only accessible on my LAN) and play doorbell.wav whenever a message is sent to that topic. The -C 1 option says to wait for one message, then exit. This is executed in a loop forever. So far this has been working great. I really love the simplicity of MQTT.

Since I run Kodi Media Center on my TV, it was also extremely easy to get these notifications to show up on my TV!
The next thing I had to do was figure out some way to notify my iPhone about ding events as well, in case someone rings my doorbell while I’m away from home. I thought this might be really difficult, since in order to do push notifications, I’d probably have to write an iOS app, and also run a server to sign and publish to Apple’s Push Notification service, and a bunch of other hooey. Fortunately, I had recently set up a Home Assistant server at home for some other projects I was working on. The Home Assistant iOS app supports push notifications, which can be used in automations triggered by MQTT events. All I had to do was set up an automation in Home Assistant that subscribes to the doorbell/ding topic, and when a message a published on that topic, Home Assistant will call its own “notify” service to push the notification to my phone (and do any number of other things). The seemingly infinite number of ways to extend and hack Home Assistant is the reason why I love using it so much for DIY IoT projects. All in all, I ended up writing no code for the server-side of this project, which is pretty neat.
The Camera
The most important part of this project for me was getting the button to notify me about doorbell dings in a way that’s entirely controlled by me, and runs only on my local network. Secondarily, I did think it would be nice to have a camera attached to it as well so I can see who is at the door before going outside to greet them. Again, since all of this is local and controlled by me, I had very little privacy concerns about adding a camera.
The fisheye camera I had bought for the Raspberry Pi was pretty good, but it’s actually missing an infrared filter on the front, so all of the images have a really purple-ish tint to them. While not very aesthetically pleasing, it does at least get the job done, and for a very low cost. Apparently this is one of the most expensive parts on a commercial-grade security camera, many of which have a mechanical IR filter that can move out of the way of the sensor at nighttime for an optimal picture in low light scenarios in addition to working well in the daylight.
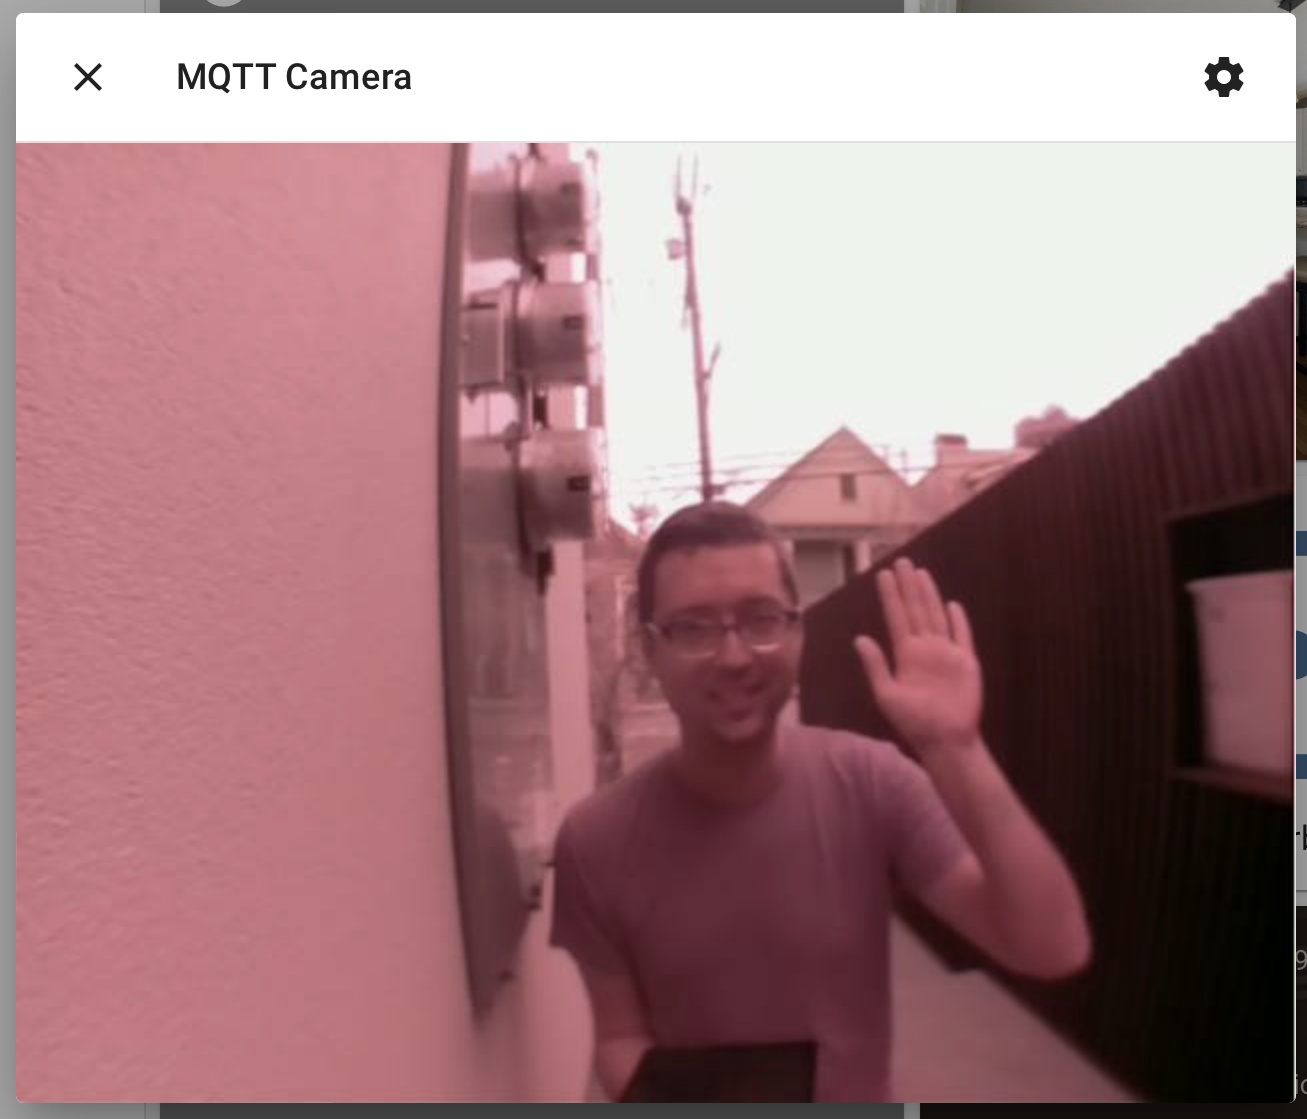
A live camera feed is accessible via the Home Assistant interface, or I can subscribe to another MQTT topic where photos of people who pressed the doorbell are posted to. The Raspberry Pi acquires these images from the camera via a Video4Linux abstraction layer that’s pretty easy to use in my program. The frames are then currently encoded as JPEGs and posted to MQTT. In the near future, I would like to have the Raspberry Pi encode a RTSP stream instead, since the Pi has a video core in its SOC specifically designed to encode video, so it would use very little power/resources.

Above is the final product, drilled, screwed, and installed onto the gate in front of my house. The LED ring is not really that noticeable during the daytime, but trust me, it’s very bright at night! It does a cool pulsing effect when idle, and blinks when pressed to acknowledge the press and to notify the visitor that someone is coming.
Since I have complete control over the hardware, there’s a lot more fun stuff I can do with this in the future. Some ideas I had were automatic face detection (in a privacy-centric on-prem way, of course), secret button codes to do things, and maybe even a built-in microphone and speaker so I could have a conversation with the visitor. Unfortunately that box is quite cramped as it is! At least the software is really easy to change.
Speaking of software, the code for the doorbell is free and open-source. You can find it on my SourceHut page.